In this subwebsite, I will write down some of the things I do with computer programming. I also have a webgpu demo here.
Making a Debugger for the Simple Parser Generator Using React/Vue/Rollup/Tauri
I have been on a parser generator, on and off, for about 6 years now. Today, I finished making a debugger for the system that I created and made a live demo of it online here:https://raymondleon.ca/demo3/index.html.
Here are screenshots of the program that I built:
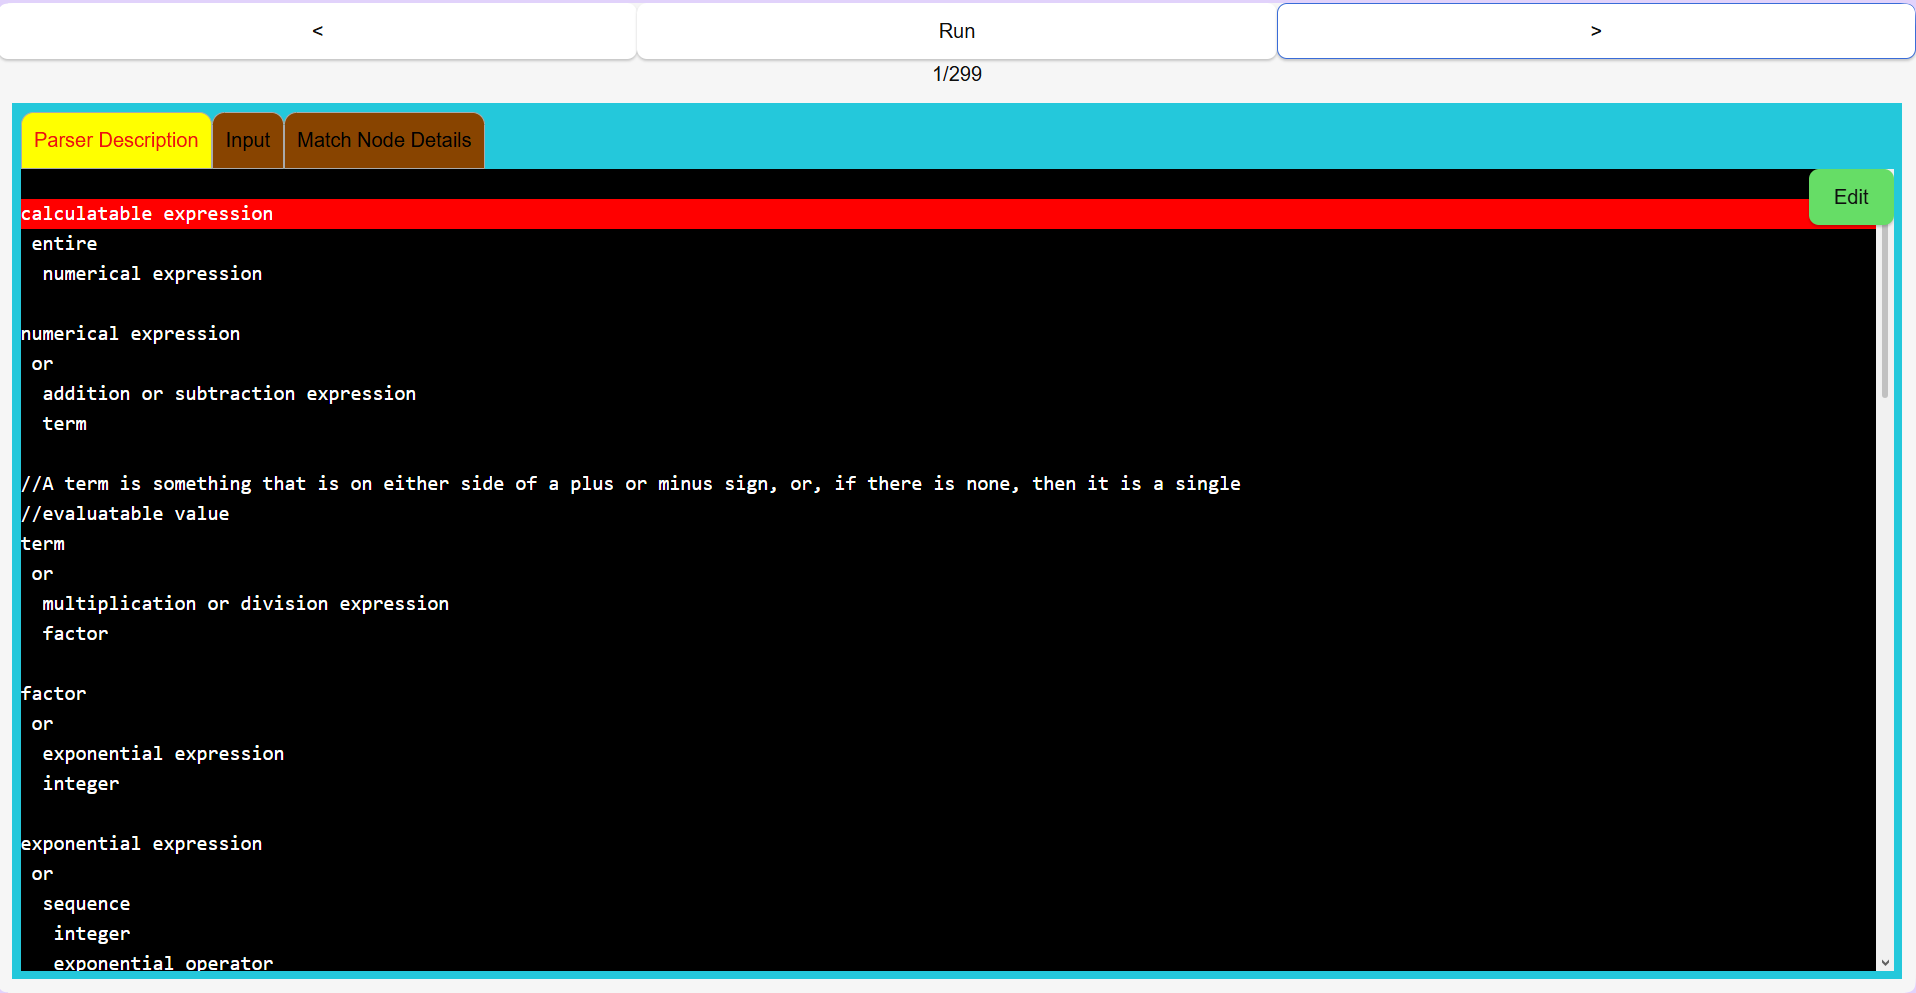 Parser description tab, screenshot 1
 Parser description tab, screenshot 2
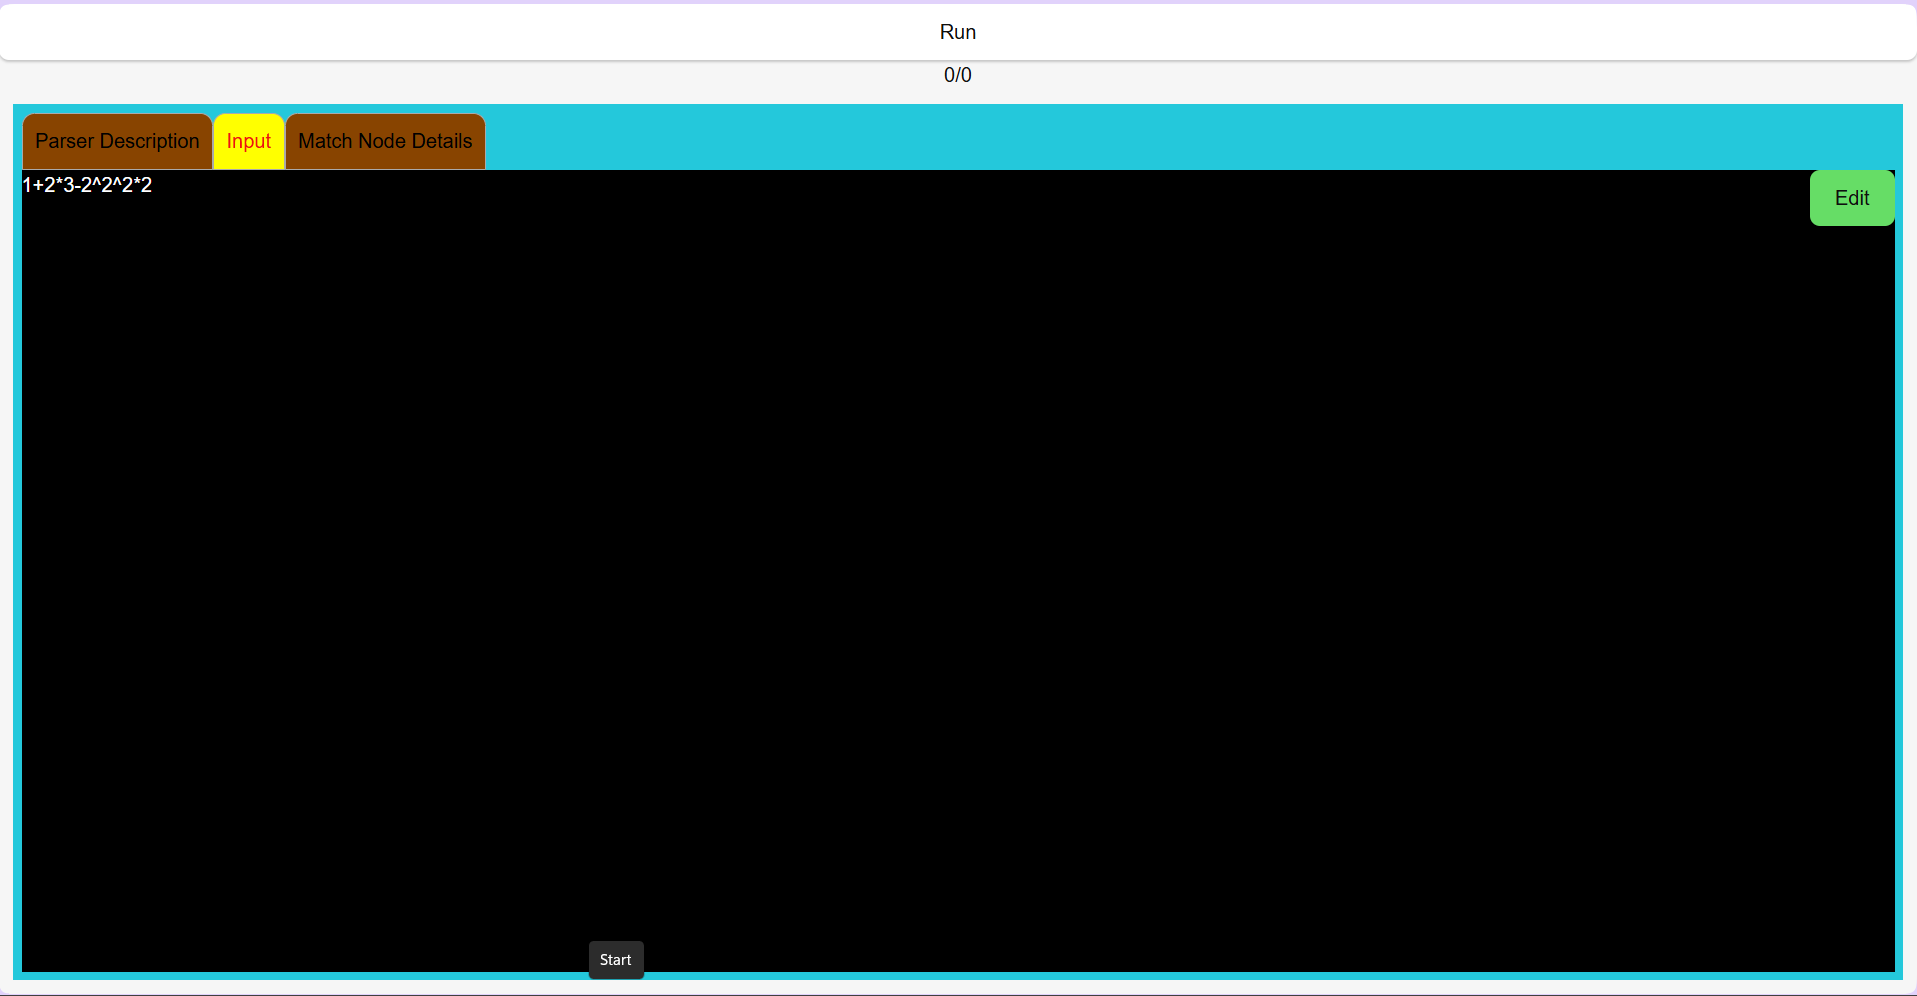 Input tab, screenshot 1
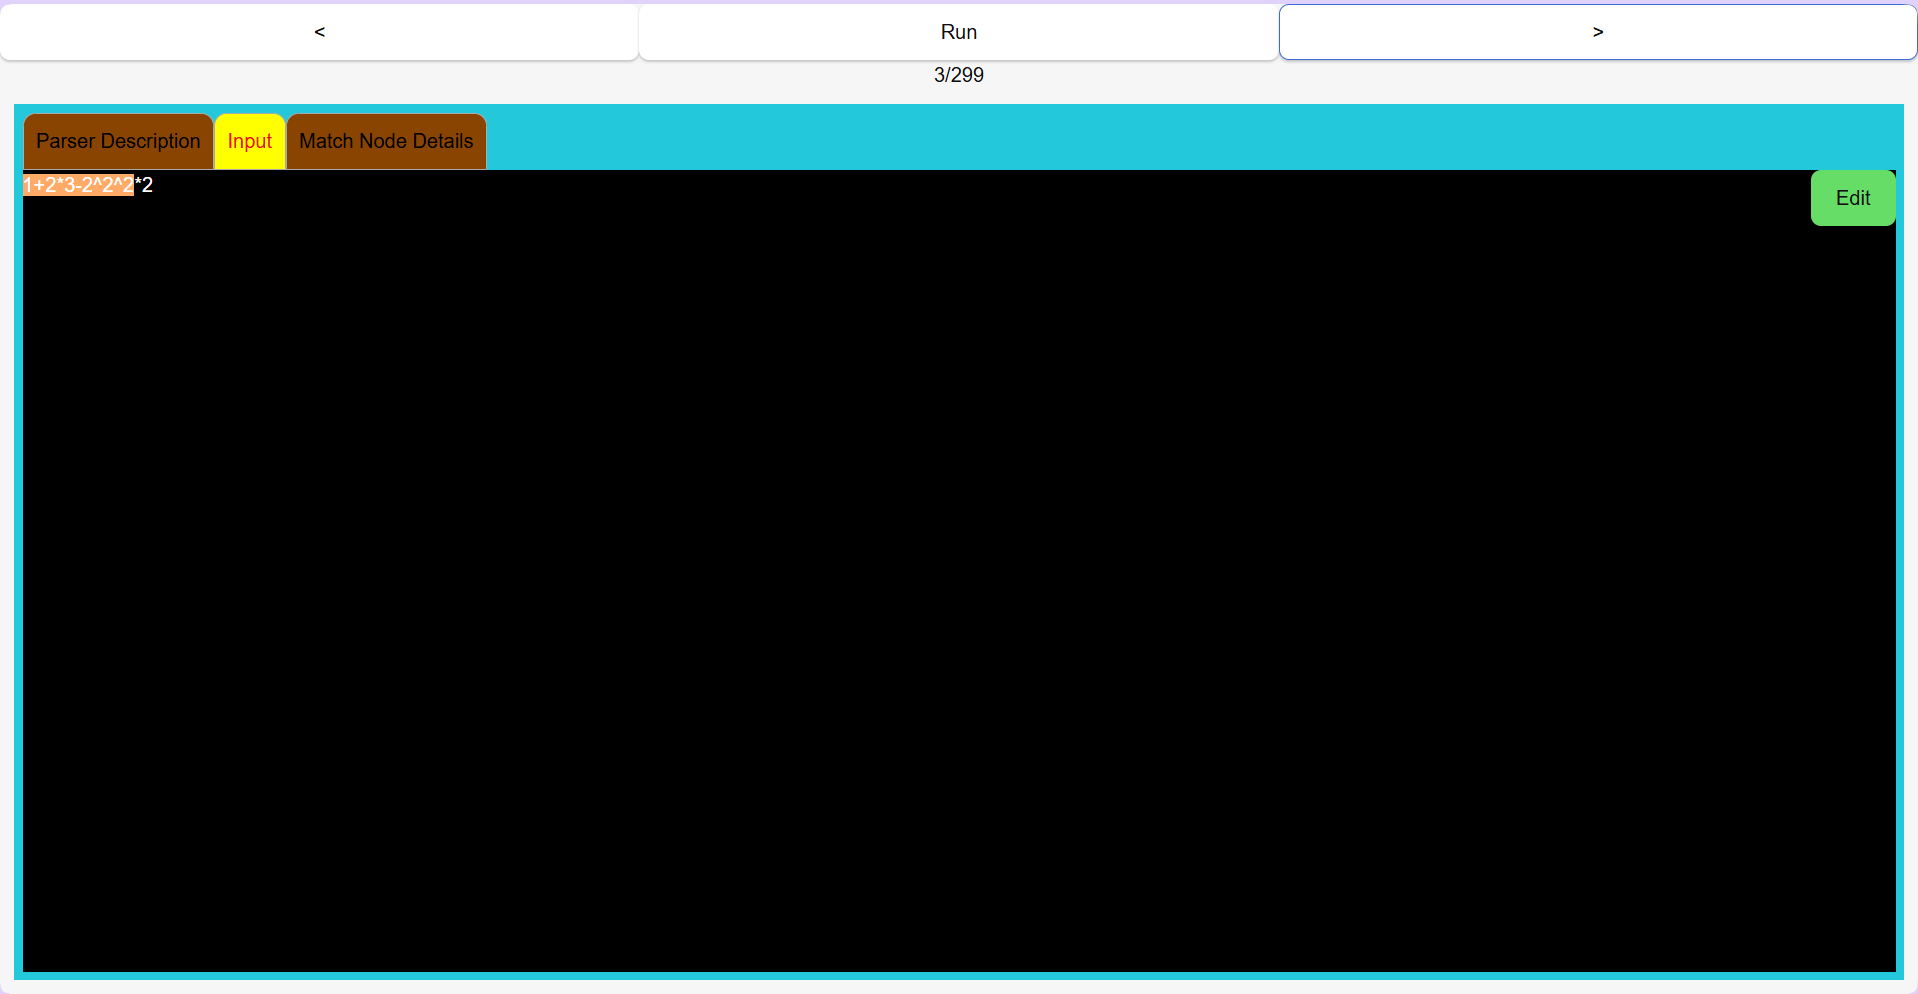 Input tab, screenshot 2
 Input tab, screenshot 3
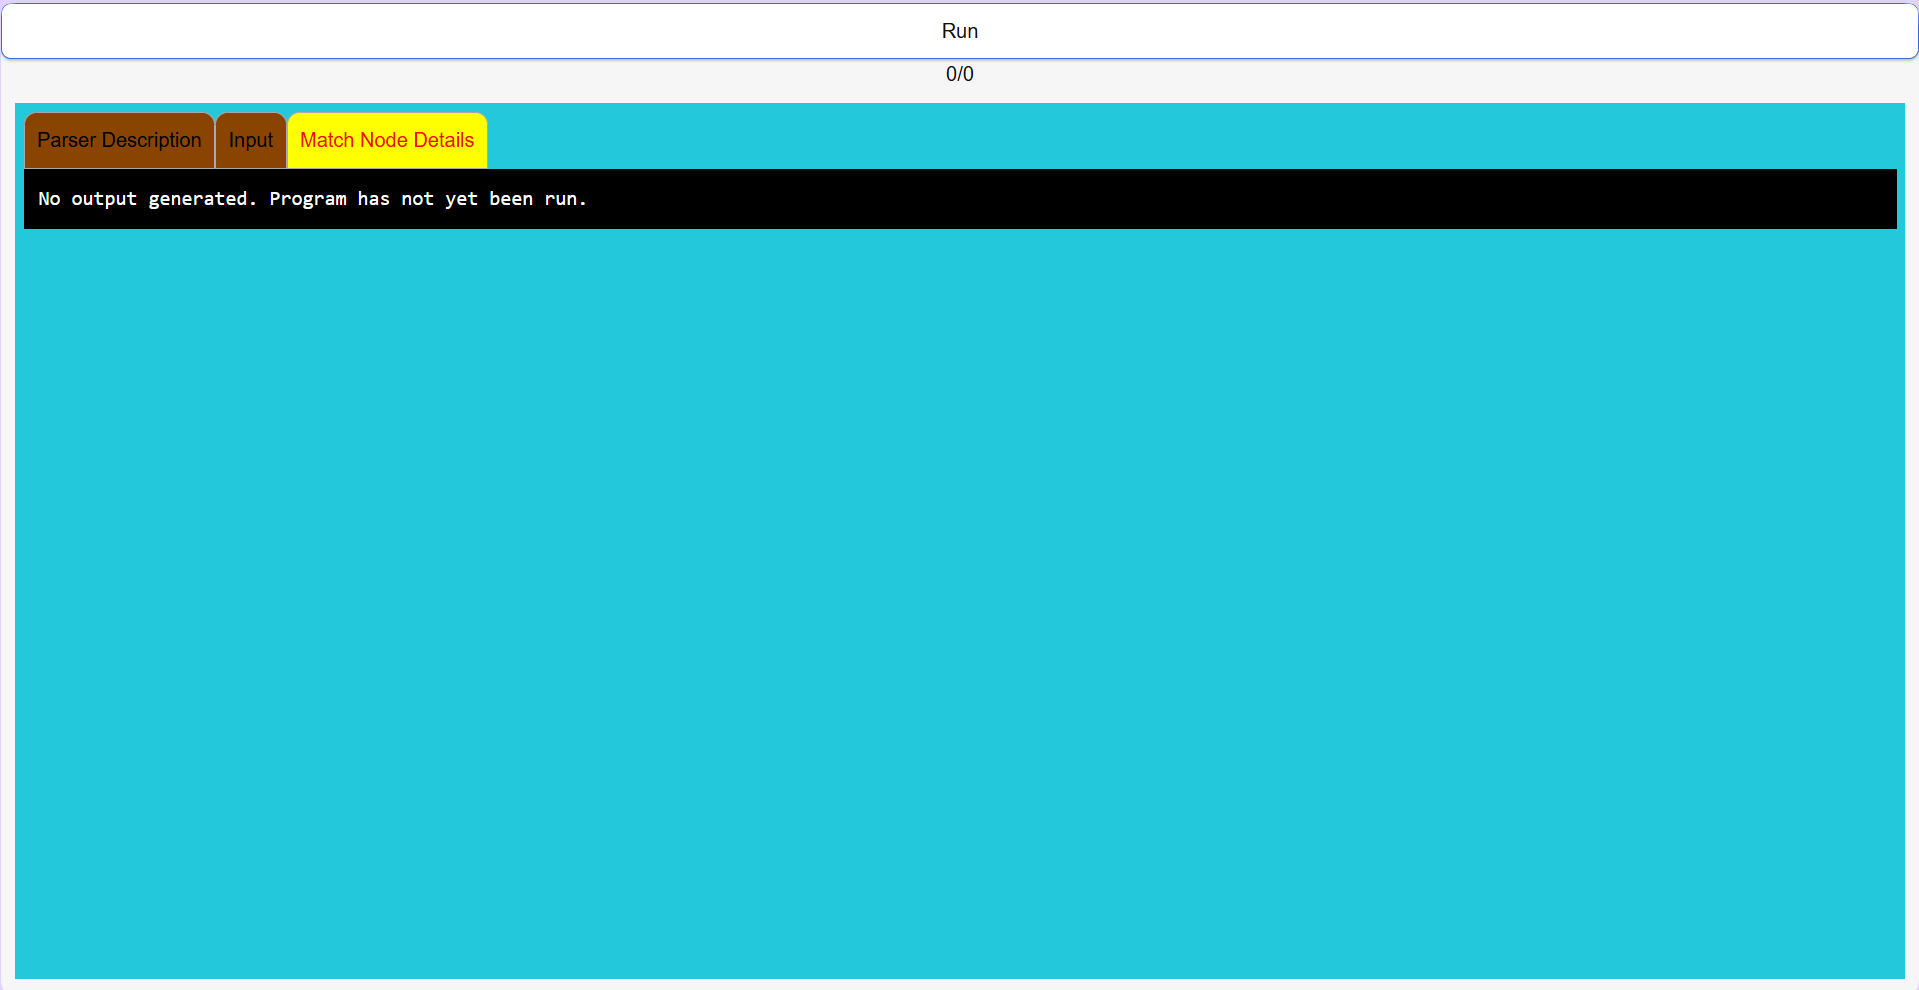 Match node tab, screenshot 1
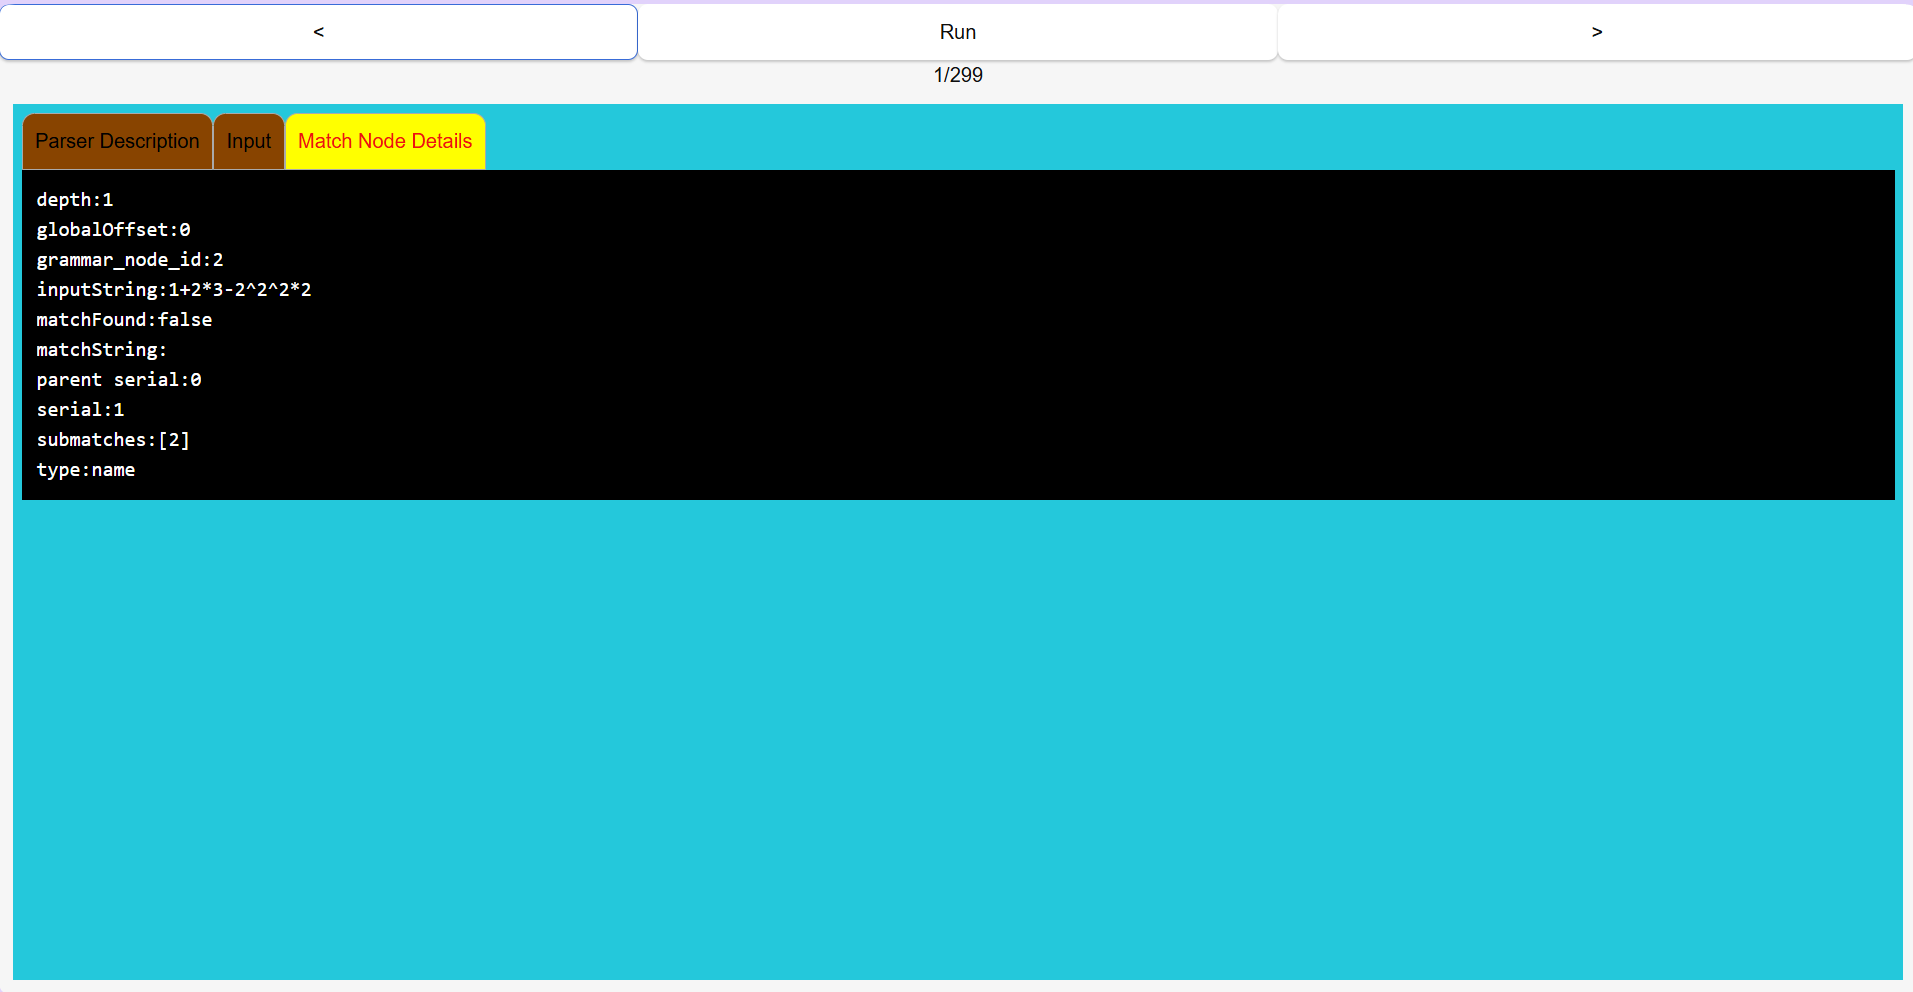 Match node tab, screenshot 2
The debugger takes in a grammar specification(see parser description screenshots 1 and 2, below) written in a minimalistic parsing language that I invented, called H1, and generates a parser based off of that specification when the Run button is pressed. Pressing the Run button also feeds in the input string to the parser that was just generated(specified in one of the tabs in the debugger). As the parser parses the input string, it generates a stream of output objects which are collected. These output objects are called 'match nodes', and are visible in third main tab of the debugger.
To see the debugger in action, press the Run button, and then press the left and right arrow keys that appear next to the Run button to trace through the parser's execution steps as it analyzes the input string. The step indicator underneath the Run button shows how many steps the parser required in order to finish its processing. As the left and right buttons are pressed, you can see the debugger highlight different lines in the parser description tab, different parts of the input string in the input tab, and displays the match node result in the match node tab.
It is rather difficult to explain everything that is happening in full detail in one blog post, but basically, the debugger allows someone skilled in the interpretation of the inner workings of the parser generated by the Simple Parser Generator to analyze whether or not the parser is working correctly.
In the past, I noticed that the Simple Parser Generator is not actually producing the correct output as I envisioned, but the thought of tracing through hundreds of steps of code to determine what is and isn't working felt daunting to me, so I decided to create this debugger to see if it might make it easier for me to analyze the correctness of the algorithms and architecture that I invented.
With the debugger complete, I now have a much more user-friendly workflow for debugging the remaining bugs in the Simple Parser Generator(SPG). Though much work remains in creating an actually useful and practical programming language, I am happy with my progress so far as I can finally provide some way to communicate to other people what exactly it is that I have been working on all these years.
The code for the Simple Parser Generator is available on my Github account, https://github.com/raymond1, and consists of at least 3 interconnected projects/packages. The code for these projects are contained in the spg-debugger, simple-parser-generator and space-tree repositories. The spg-debugger is the system I completed today. The simple-parser-generator repository contains the main parser generator code. The space-tree repository contains some code for a serialization format that is meant to be a simpler/more minimalistic alternative to JSON and forms the basis of the syntax used in the H1 language. The space-tree repository also contains some utility functions for performing basic manipulations of space-tree data.
January 26, 2026
Making a Russian Roulette Simulator in Python
There's a computer game on the Internet that I've heard contains a implementation of a version of the game of Russian Roulette. Though not a player of the game itself, I have heard about it, and, specifically, about the version of Russian Roulette that can be played inside the game. From what I've heard, the game works as follows: two players meet together and agree to play the game. An empty revolver containing six empty chambers is produced, and a single bullet is placed into one of the six chambers. The cylinder of the revolver is spun extremely quickly and randomly, and, the two players wait until spinning stops. The result is a gun with a random and unknown placement of a bullet inside one of six chambers. The two players each take turns firing one, two, or three times bullets at themself. If they shoot themself, the game stops and the player who got shot loses the game. Player one always shoots first. The game continues until someone loses. The winner of the game is the player who did not get shot.
In order to better understand the probability of certain events of interest to myself and someone who played the game online, I wrote a Python simulator to see how often certain outcomes occur. The code is shown below:
import random
import pickle
from typing import Tuple
import os

class Statistics:
    def __init__(self):
        self.winner = "0"
        self.bulletChoices = []

    def __str__(self):
        bulletChoicesString = ""
        for i in range(0,len(self.bulletChoices)):
            bulletChoicesString += str(self.bulletChoices[i]) + ","

        bulletChoicesString = bulletChoicesString[:-1]
        return "winner: " + str(self.winner) + ", bullet number choices: " + bulletChoicesString

    def getBulletChoiceTuple(self):
        if (len(self.bulletChoices) == 1):
            return (self.bulletChoices[0])
        elif (len(self.bulletChoices) == 2):
            return (self.bulletChoices[0], self.bulletChoices[1])
        elif (len(self.bulletChoices) ==3):
            return (self.bulletChoices[0], self.bulletChoices[1],self.bulletChoices[2])
        elif (len(self.bulletChoices) ==4):
            return (self.bulletChoices[0], self.bulletChoices[1],self.bulletChoices[2],self.bulletChoices[3])
        elif (len(self.bulletChoices) == 5):
            return (self.bulletChoices[0], self.bulletChoices[1],self.bulletChoices[2],self.bulletChoices[3],self.bulletChoices[4])
        elif (len(self.bulletChoices) == 6):
            return (self.bulletChoices[0], self.bulletChoices[1],self.bulletChoices[2],self.bulletChoices[3],self.bulletChoices[4],self.bulletChoices[5])

        return ()

def fire(gunState):
    returnValue = "blank"

    if gunState[0] == "X":
        returnValue = "shot"

    rotate(gunState)

    return returnValue


def getGunState():
    bulletChamber = random.randint(0,5)
    gunState = ["E", "E","E","E","E","E"]
    gunState[bulletChamber] = "X"
    return gunState

def rotate(gunState):
    first = gunState[0]
    for i in range(0,5):
        gunState[i] = gunState[i + 1]

    gunState[5] = first

def getNumberOfBulletsToFire(shotsRemaining):
    if shotsRemaining > 3:
        return random.randint(1, 3)

    return random.randint(1, shotsRemaining)

def playOneMatchAndGetStatistics():
    gunState = getGunState()
    print('gunState', gunState)
    statistics = Statistics() #winner: 1 or 2. Game: "1,2,1,2"

    player = 1 #player holding the gun

    someoneDied = False
    totalShotsRemaining = 6
    while True:

        numberOfBulletsToFire = getNumberOfBulletsToFire(totalShotsRemaining) #prevent shooting more than 6 bullets
        statistics.bulletChoices.append(numberOfBulletsToFire)

        for x in range(0,numberOfBulletsToFire):
            result = fire(gunState)
            totalShotsRemaining -= 1
            if result == "shot":
                someoneDied = True
                statistics.winner = 3 - player
                break

        if someoneDied:
            break

        player = 3 - player

    return statistics

count = 0
totalStatistics = {}
while True:
    statistics = playOneMatchAndGetStatistics()
    bulletChoiceTuple = statistics.getBulletChoiceTuple()
    if not bulletChoiceTuple in totalStatistics:
        totalStatistics[bulletChoiceTuple] = 0

    totalStatistics[bulletChoiceTuple] += 1

    sortedDict = dict(sorted(totalStatistics.items(), key=lambda item: item[1]))
    print("\x1b[2J\x1b[H")
    #print("\\033[H\\033[J")
    print('Total Statistics', sortedDict)
#    print(gunState)
#    rotate(gunState)
#    if count > 10:
#        break

    count = count + 1
The output from the above code generates a page of statistics something similar to the following:
Total Statistics {(1, 1, 1, 1, 1): 469, (1, 1, 1, 1, 1, 1): 536, (1, 1, 1, 1, 2): 1024, (1, 1, 1, 2, 1): 1031, (1, 1, 1, 1): 1043, (2, 1, 1, 1): 1486, (1, 1, 2, 1, 1): 1490, (1, 2, 1, 1, 1): 1505, (1, 2, 1, 1): 1523, (2, 1, 1, 1, 1): 1547, (1, 1, 2, 1): 1554, (1, 1, 1, 2): 1996, (1, 1, 2, 2): 2975, (1, 2, 1, 2): 2981, (1, 1, 3, 1): 2991, (1, 2, 2, 1): 3016, (2, 1, 1, 2): 3025, (2, 1, 1): 3027, (1, 2, 1): 3030, (1, 1, 1, 3): 3034, (2, 1, 2, 1): 3054, (1, 1, 1): 3057, (3, 1, 1, 1): 4439, (3, 1, 1): 4495, (1, 3, 1): 4626, (2, 2, 1): 4629, (2, 2, 1, 1): 4727, (1, 3, 1, 1): 4743, (1, 2, 2): 6159, (1, 1, 2): 6173, (2, 1, 2): 6178, (1, 2, 3): 8956, (3, 2, 1): 9047, (3, 1, 2): 9095, (2, 1): 9098, (3, 1): 9139, (1, 1, 3): 9148, (2, 3, 1): 9171, (1, 3, 2): 9192, (1, 1): 9213, (2, 2, 2): 9307, (2, 1, 3): 9320, (2, 2): 18262, (3, 2): 18348, (1, 2): 18405, (2, 3): 27161, (1, 3): 27216, 1: 27382, (3, 3): 27423, 2: 54977, 3: 82572}
The output is formatted in the form of a tuple followed by a colon followed by a number of occurrences. Each tuple corresponds to a sequence of number of bullets chosen to be fired in a game of Russian Roulette with a Choice of One to Three Bullets(I will call the game Russian Roulette for short). The number following the colon is the number of games played of that type. Because the person who last fired the revolver in a recorded sequence of bullet choices in the game of Roulette, the winner is actually the person who did not last fire the gun. So, for odd tuples, the winner is player 2, and in even tuples, the winner is player one. By counting the number of winners for each game choice sequence, an idea of the relative frequency of the different outcomes can be acquired by running the above Python program. The game choice sequences are ordered from least common to most common. So, the game choice sequence (1,1,1,1,1)where player one shoots one bullet, and then player 2 shoots one bullet, and then player one shoots one bullet and then player two shoots one bullet, and then player one shoots one bullet, ending the game by getting shot, happened 469 times in the above simulation. That type of game happens much less often than the most common game sequence, where player one shoots three bullets in the first round. In the above simulation, that game choice sequence occurred 82572 times.
After some thinking, I realized that the above game choice frequencies assume a random choice of one, two, or three bullets. In the virtual computer game where this version of Russian roulette is played, however, humans tend not to make the choice to fire 3 bullets at themselves in the first round. I realized that I would need to actually calculate some probabilities and do some mathematical thinking in order to answer a question I had. The question that I had was this: If player 1 shoots one bullet, and then player two shoots two bullets, when it is player 1's turn for the second time, is the probability of player 1 winning the same for firing 2 bullets at that time versus firing one bullet at that time? The answer to this question was of interest to someone who played this version of Russian roulette on the computer because he had earlier on already calculated that if player 1 fires 1 bullet in the first round, the chance of player 2 winning if he fires either one or two rounds is the same.
In my thinking, I believe that the situation where player one fires one bullet and then the second player fires two bullets and survives can be represented as a game where a gun has three bullets and three chambers, and it is player one's turn to fire one or two bullets.
If player one fires one bullet, the chance of surviving the entire game would be the chance of the event that the player survives and that player 2 dies. Assuming that player 2 shoots only one bullet so as not to ensure his own suicide, the probability of surviving if player one shoots one bullet in a 3 chamber game is (2/3)*(probability player two dies in a two-chamber game). The probability of dying a two-chamber game is 1/2. Therefore, I calculated that the chance of surviving if player one fires one bullet in a 3-chamber game is (2/3)*(1/2) = 1/3.
If player one fires two bullets in a 3-chamber game, the chance of surviving is the chance that the player survives the first bullet and the second bullet. The chance of surviving the first bullet is 2/3. Then, the game becomes a two-chamber game in which the chance of surviving is 1/2. The probability that player one survives the first bullet and the second bullet is the product of the two probabilities, which is 1/3. Therefore, firing one or two bullets when there are 3 bullets left gives the same probability of survival if it is assumed that the second player is not suicidal. In general, I think it's better to shoot only one bullet, to give the second player a chance to suicide irrationally in the computer game.
The reason why I calculated this problem is that the human players playing Russian roulette in the online game sometimes want the games to go faster. It is easier to shoot two bullets to get the game over sooner than it is to wait longer by shooting one bullet and then waiting for the second player to respond and then have to shoot again.
January 5, 2026
How to Host Your Dev Website with a Locally Generated SSL Certificate on a Local Dev Environment
It is possible to access your own local development website using an HTTPS connection that uses an SSL
certificate generated for free specifically for local development purposes. Below, I detail one method to do
this.
Step 1) Select a Server Name and Update hosts File
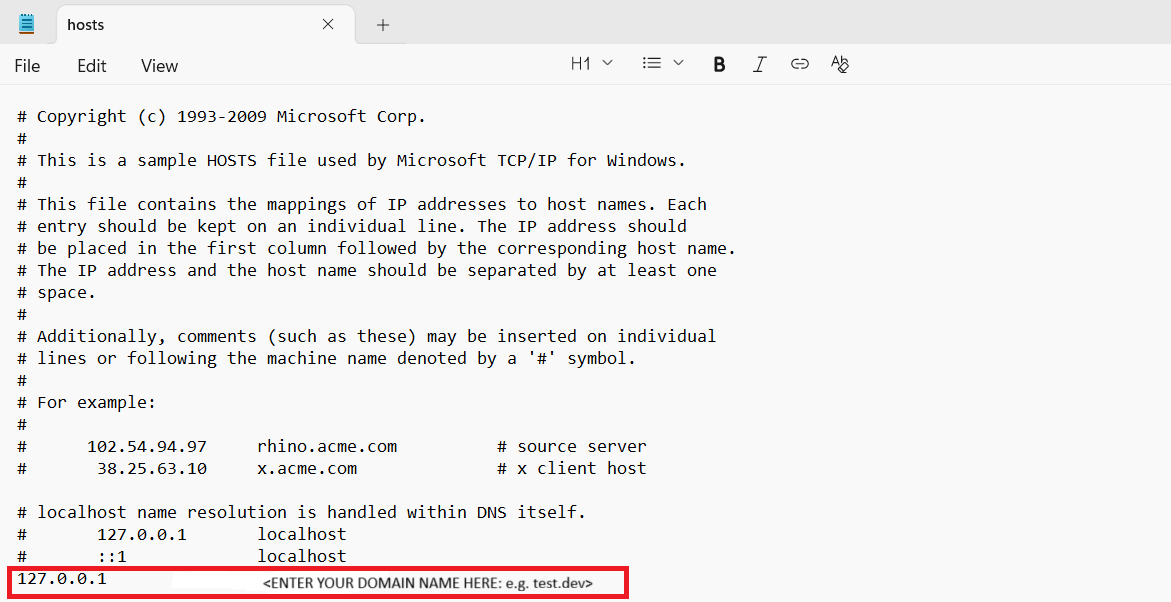
First, select a fake domain name with at least two parts, such as "test.dev". I use two parts because I
remember encountering software once that would not work with a single level domain name. After selecting the
two-part domain name, add the entry to the hosts file so that references to your made up fake local testing
domain name redirects to your own computer's IP address, 127.0.0.1. For example:
127.0.0.1 test.dev
Step 2) Generate SSL Certificates
After choosing a domain name, you can use a tool that I created using Go in order to generate a fake root
certificate, a fake intermediate certificate, a fake certificate for the server and a fake certificate for the
server bundle. Understanding why and how this script works is important, but requires an understanding of some
concepts around certificates and is not the purpose of this article. Do not use these certificates in a
production environment.
The tool can be downloaded by cloning the Go project from Github.
git clone https://github.com/raymond1/generate_certificates.git.
After cloning the repository, enter the directory generated from the cloning command and run the following
command to generate root, intermediate and server certificates for your fake development domain name:
go run generate_certificates.go <domain name>
At this point, the command prompt will probably spew out a whole bunch of logging statements about actions that
the command is taking. The 'output' folder will contain a folder named after the argument that you passed into
the go run generate_certificates.go command as your domain name. Inside that folder there should be the
following files: server.pem, which will be the private key for your server, server.crt, which should be the
public certificate for that server's private key, and server_bundle.crt, which should be a certificate
containing your server's certificate, the intermediate authority's certificate, and the root authority's
certificate bundled together. The file server_bundle.crt is probably the certificate you want to install into
your development web server.
Install the certificate onto your development web server and then check if you can see the SSL certificate you
generated using a browser.
You may want to use your browser or operating certificate management systems to trust the fake root certificate
that you generated at this point.
Troubleshooting and Exploration
The above guide may not have worked for you. Here are some troubleshooting avenues that may help. The tool
OpenSSL can be used to view the contents of the web certificate served by your web server. Verify that the start
and end dates match and fingerprint match with what you expect. For example, you can view the contents, start
and end dates of the certificates generated with the command
openssl x509 -in server_bundle.crt -startdate -enddate. The command will need to be run from the
output/domain_name folder where the certificates were generated. The output will look something like this:
>openssl x509 -in server_bundle.crt -startdate -enddate
notBefore=Nov 26 03:19:32 2025 GMT
notAfter=Dec 28 03:19:32 2026 GMT
-----BEGIN CERTIFICATE-----
MIIDLDCCAhSgAwIBAgIBBjANBgkqhkiG9w0BAQsFADAtMSswKQYDVQQDDCJJbnRl
cm1lZGlhdGUgQ2VydGlmaWNhdGUgQXV0aG9yaXR5MB4XDTI1MTEyNjAzMTkzMloX
DTI2MTIyODAzMTkzMlowHTEbMBkGA1UEAwwSdGVzdHJheW1vbmRsZW9uLmNhMIIB
IjANBgkqhkiG9w0BAQEFAAOCAQ8AMIIBCgKCAQEArymbPZILEIjqAWj9u2Bw9sUK
rYlsfJAOYaJgTyZ9omD/+1GKzmeUif0fuWfhr6/wBNSlqAlNQmoBPzrA/zopWHwD
qxCIOrTFki3+K9S0l4RMM7apDfIdw60WLMZWPqr1aOUBhf2j43stT5UHH9Gg8oaO
fW1LUYZTt4ay4u5QAyY+itIYeAAoh6kJ/5+3mT9VshvHqbRSAyF6VXyuhpF96Jqp
ikmvys8S3RStCWVGVK5YmhzcbfJT+qQ89osQwTB9cXG/Bd/eJThANUT4YG5ZZoZc
XTWxuLKl07cYuLokZguf/Unioh0QWM/ohqj0fKIgni/z61YxIaxHHFiXttWN0wID
AQABo2cwZTAjBgNVHREEHDAaghJ0ZXN0cmF5bW9uZGxlb24uY2GHBH8AAAEwHQYD
VR0OBBYEFOKY9IaoHH9YEq/+7BiY1a+C8K5FMB8GA1UdIwQYMBaAFOkEaUpqO0AL
hZ8lzTuvcPuwN9yOMA0GCSqGSIb3DQEBCwUAA4IBAQBXskGmvYcRtD2PH7Ou8UM5
tC5XZ8BofNj3Fdq7i5PvQYLicqU0yQjXyeHxhwZqPtvmtOEbrbr2DjDFsrA7lPFy
KSDj7k/3zQB/rqSClYqn/xaEo6pS8/2OYbVf3b/oH/+2YyZh9VoHk+yiJCU62MDk
hiBceFzc84BA0WEBhsdFgdiQCmMH6sDQPIxks5UvyD0+RvRFQzSIIiPUI4eS3Ere
QUA+T5TAjDtSFpTUybHCoKh57nL6xUzAGo+XneFxoLuAdQmnn8L+DjGWQDhNqjU1
WdyzhuO4V4cqcrSyGMAvMaWkS8rsMpsDEWVtsnFQnyfkNZE3G319dXtsHlguLzuO
-----END CERTIFICATE-----
After obtaining the certificate details, you can compare it with the certificate that the browser generated.
Look up how to view the SSL certificate for your browser, and compare the actually downloaded certificate you
see with the one you expected to have been installed. Using this method, I was able to discover that using XAMPP
and Apache under an administrative install at the same time as running my own webserver under a
non-administrative install in Linux means that the port 80 binding that I used for my non-administrative account
webserver was overridden by Apache, which then served its own default certificate instead of the certificate I
expected from my own web server.
Last updated December 6, 2025
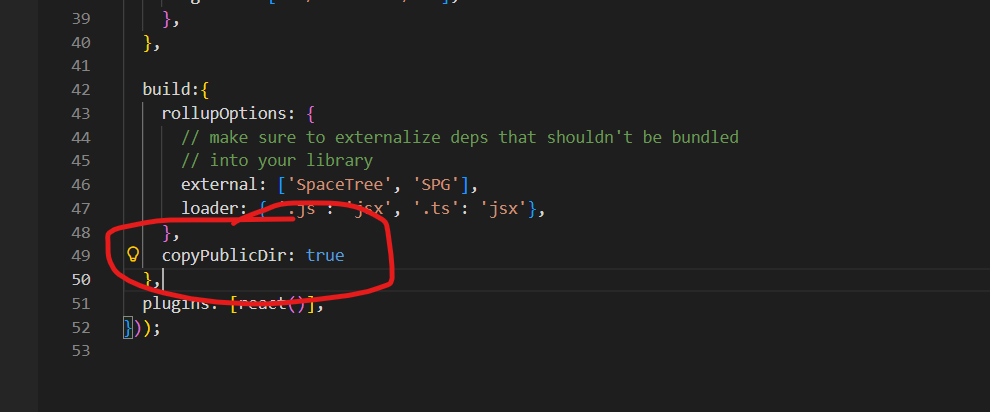
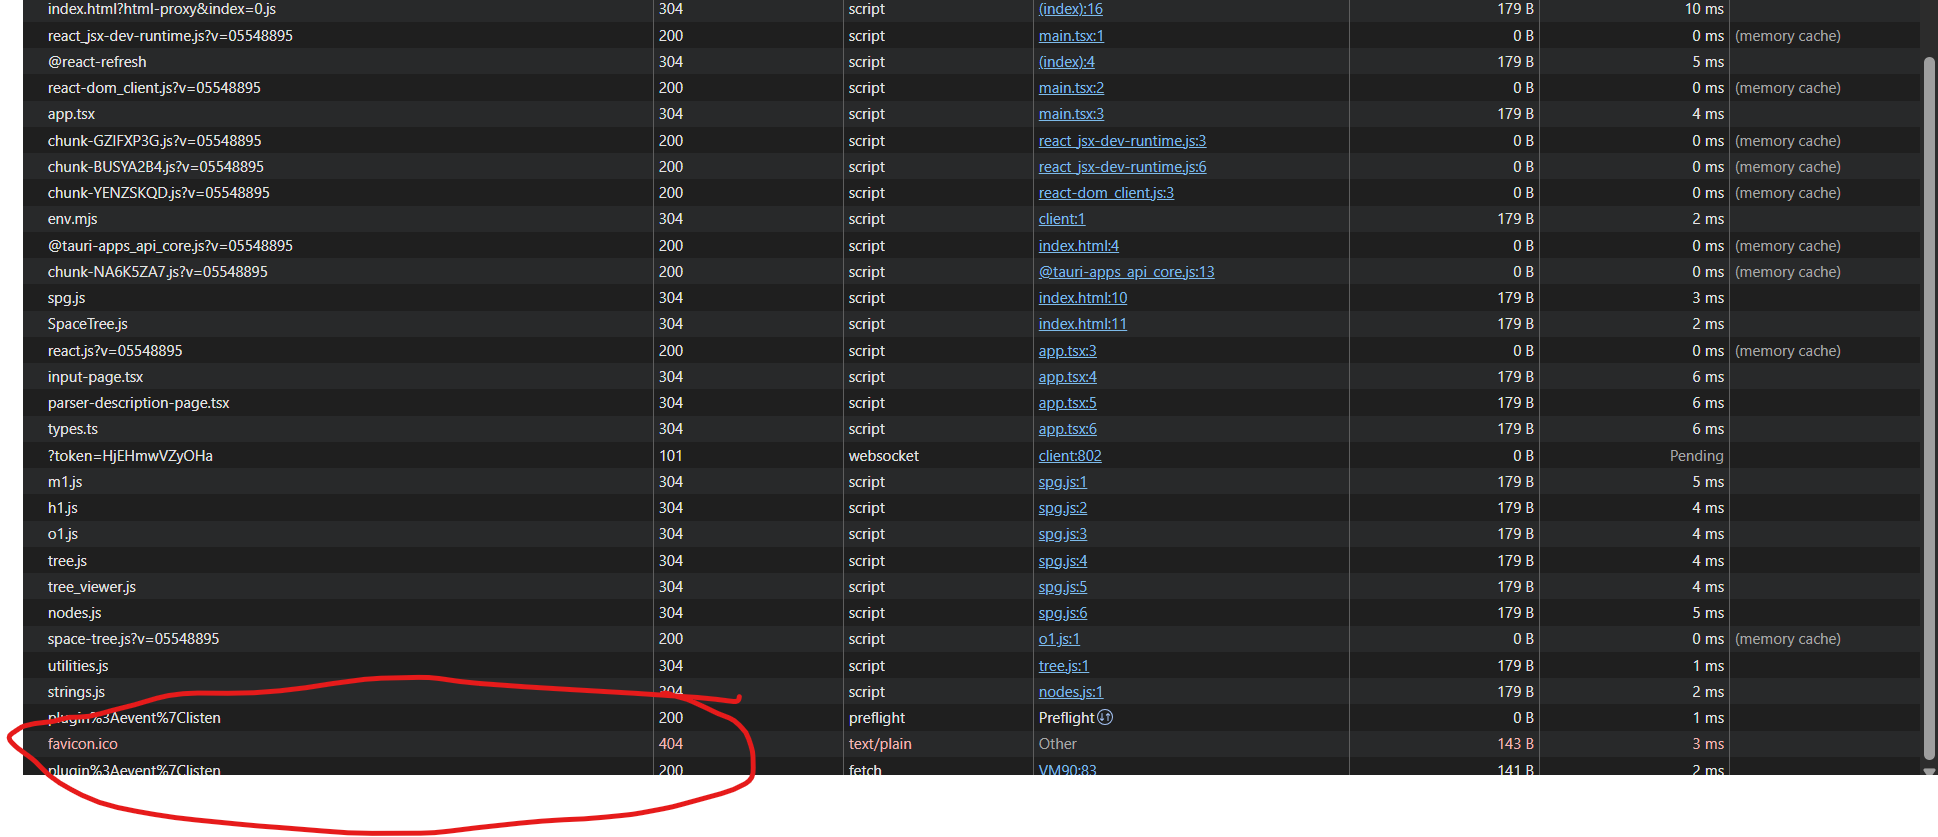 As a result, if you inspect the network activity of a Tauri interface from a browser, you will see a 404 error for the favicon.ico file. It took me much longer than anticipated to finally understand how to fix this issue using my setup, which used a Vite front end connected to a Rust back end. I had to first understand that the resolution to this problem would not be found in the Tauri documentation, and would have to be found from the Vite documentation instead.